Showing posts with label tutorial. Show all posts

Tuesday, 21 May 2013

Blog following options and a Facebook giveaway

Aloha!

So since my disappearance and come back, Google reader apparently disappeared from the blogging world. Now, I never used Google Reader anyway, but I know a lot of people did, so I wanted to introduce you to some other ways you can stay up to date with Sparkle and Shade! Read below to find out how to follow me on Facebook, Bloglovin, She Said Beauty, Google+ and GFC.

Facebook Page
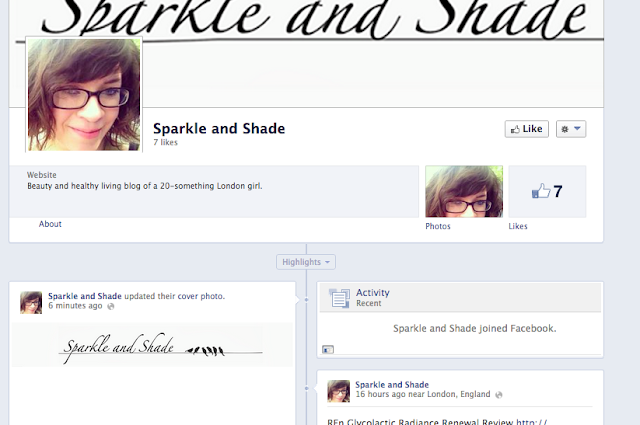

Sparkle and Shade Facebook


At the moment, my Facebook page is all shiny and new! It's pretty quiet over there at the moment, but things will be getting much more exciting, with chat and competitions and all sorts of things.

Also, to celebrate the launch of the page, I'm going to be hosting a giveaway! There'll be 3 tiers of prize:
50 Followers - winner will receive a small selection of high end skin care samples and an extra surprise treat!
100 Followers - winner follower will receive a £10 Feel Unique voucher and a little bag of samples & treats
200 Followers - winner follower will receive a £20 Feel Unique voucher and a little bag of samples & treats.

To enter the giveaway, simply head over to Facebook and "like" Sparkle and Shade. The winners will be selected by a random draw as each tier is reached and will be announced on the Facebook page. Good luck.

Bloglovin'


I've been using Bloglovin' for ages - it's one of my favourite readers. I think it's clear, simple and easy to navigate. One of my favourite things about Bloglovin' is that you can sort blogs into different folders or categories! This is perfect for me as I follow a lot of healthy living, cooking and weight lifting blogs as well as beauty, so it's nice to be able to section everything out. A definite thumbs up from me, so head over there and follow!

She Said Beauty
She Said Beauty is a relatively new one to me, but seems like a lot of fun! You can build your own beauty shelf and create lovely lists of things you love and own, as well as staying up to date with all your favourite blogs. It seems like a really fun and friendly community, and I've been enjoying playing around with it so far. Head on over to follow me

Google +
You can also follow by Google+. I remain unconvinced by Google+, but I know some people absolutely love it, so I thought I'd give you the option to follow me over there!

Google Friend Connect
Now, the internet is rife with rumours about whether this is staying or going. For now, it seems to be staying put. Super simple - just click the link on the side bar! This is probably easier if you already use Blogger, as these blogs will come up in your reading list.


So there you have it - lots of options for following Sparkle and Shade, so now there's no excuse to not stay up to date!

What's your favourite way to follow your most loved blogs?
RSS Feed | Bloglovin | Facebook | Google+ | Twitter

Thursday, 6 January 2011

Tutorial - Fleecy Headband/ear warmer

Hello lovelies! Hope you've having a fantastic week so far. Today I'm going to teach you how to make a quick and easy fleecy headband you keep your ears warm this winter. I wear mine under my helmet when I'm cycling or under my hat when it's really really cold! I'm a novice sewer and this took me about 25 minutes from start to finish! Easy peasy :D

You're going to need:

  • A piece of fleecy fabric 4.5 inches wide and about 24 inches long (measure your head and then add a couple of inches)
  • A piece of patterned (or plain) cotton fabric of the same dimensions
  • Sewing bits (sewing machine, thread, pins, scissors, tape measure etc)
To start, lay out your fleecey fabric and cut the right size piece. I used an old blanket that we no longer use.

Next, cut out your cotton fabric. I was ultra lazy and pinned my fleece to my material and then cut around it. If you're less lazy than me, measure and mark it out properly (you'll end up with much straigheter lines than I did!)


If you haven't already, pin your fabric together with the right sides facing each other.


Tadaaaaa! Excellent, now we're ready to start sewing. Thread your machine and then sew down each of the long sides in turn (be sure to use a reverse stitch at the end to stop your stiching from coming undone mid-cycle) and then sew long one of the shorter sides. When you're sewing, you want to be about 1.5cm in from the edge

Next, sew half way along the remaining shorter sides but don't sew it up completely! 

We're going to turn it the right way out in a minute, but first you need to trim the seams down a little to make it less bulky when we turn it (If you're a better sewer than me, you can probably start off sewing a little closer to the edge and then skip this step!)


Now comes the exciting part - turn your headband the right way round by turning it in on itself using the hole that you left before!


You should be left with something that looks like this. If you're really good, I'd advise ironing it now but err... yeah I'm lazy! You'll need to sew up the hole using a slip stitch.


Now it's time to make this big long strip into a headband. I chose to doe this by zigzagging the two ends together - however you could also pop in a buttonhole and a nice button or maybe a wee bit of velcro. And Hey Presto - no more cold ears for you :D

Hope you've enjoyed it - let me know what you think! This is my first tutorial though so do be kind! Let me know if you make one yourself xx


RSS Feed | Bloglovin | Facebook | Google+ | Twitter

Friday, 26 February 2010

Eeeek....I made a video

So one of the things that inspired me to get back into make up was spending many hours browsing the youtube make up gurus - Sirvinya, Oxford Jasmine,PixiWoos etc.Anyway, I thought I'd do a wee video to show you my Alice palette and a little tutorial for the look that I did with it today :)


Enjoy! Please do comment/rate and let me know what you think!
RSS Feed | Bloglovin | Facebook | Google+ | Twitter